Dùng Middleware để xử lý lỗi ASP.NET Core Web API.
Nguồn :
https://code-maze.com/global-error-handling-aspnetcore/
In this article, we are going to talk about:
Error Handling with Try-Catch Block
To start off with this example, let’s open the Values Controller from the starting project (Global-Error-Handling-Start project). In this project, we can find a single Get() method and an injected Logger service.
It is a common practice to include the log messages while handling errors, therefore we have created the
LoggerManager service. It logs all the messages to the
C drive, but you can change that by modifying the path in the
nlog.config file. For more information about how to use Nlog in .NET Core, you can visit
Logging with NLog.
Now, let’s modify our action method to return a result and log some messages:
1
2
3
4
5
6
7
8
9
10
11
12
13
14
15
16
17
18
19
20
21
22
23
24
25
26
27
28
29
30
31
32
33
34
35
36
37
38
|
using System;
using LoggerService;
using Microsoft.AspNetCore.Mvc;
namespace GlobalErrorHandling.Controllers
{
[Route("api/[controller]")]
[ApiController]
public class ValuesController : ControllerBase
{
private ILoggerManager _logger;
public ValuesController(ILoggerManager logger)
{
_logger = logger;
}
[HttpGet]
public IActionResult Get()
{
try
{
_logger.LogInfo("Fetching all the Students from the storage");
var students = DataManager.GetAllStudents(); //simulation for the data base access
_logger.LogInfo($"Returning {students.Count} students.");
return Ok(students);
}
catch (Exception ex)
{
_logger.LogError($"Something went wrong: {ex}");
return StatusCode(500, "Internal server error");
}
}
}
}
|
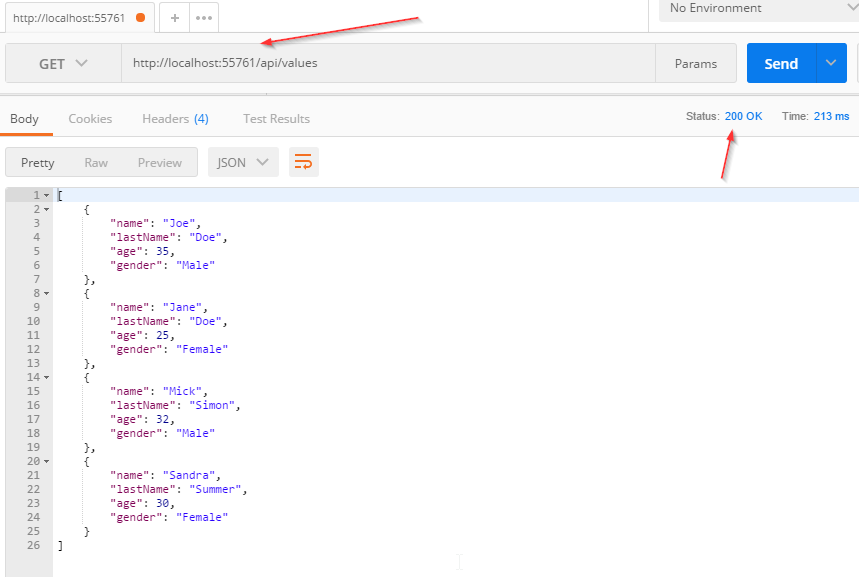
When we send a request at this endpoint, we will get this result:
And the log messages:
We see that everything is working as expected.
Now let’s modify our code, right below the GetAllStudents() method call, to force an exception:
|
|
throw new Exception("Exception while fetching all the students from the storage.");
|
Now, if we send a request:
And the log messages:
So, this works just fine. But the downside of this approach is that we need to repeat our try-catch blocks in all the actions in which we want to catch unhandled exceptions. Well, there is a better approach to do that.
Handling Errors Globally with the Built-In Middleware
The UseExceptionHandler middleware is a built-in middleware that we can use to handle exceptions. So, let’s dive into the code to see this middleware in action.
First, we are going to add a new class ErrorDetails in the Models folder:
1
2
3
4
5
6
7
8
9
10
11
12
13
14
15
16
|
using Newtonsoft.Json;
namespace GlobalErrorHandling.Models
{
public class ErrorDetails
{
public int StatusCode { get; set; }
public string Message { get; set; }
public override string ToString()
{
return JsonConvert.SerializeObject(this);
}
}
}
|
We are going to use this class for the details of our error message.
To continue, let’s create a new folder Extensions and a new static class ExceptionMiddlewareExtensions.cs inside it.
Now, we need to modify it:
1
2
3
4
5
6
7
8
9
10
11
12
13
14
15
16
17
18
19
20
21
22
23
24
25
26
27
28
29
30
31
32
33
34
35
36
|
using GlobalErrorHandling.Models;
using LoggerService;
using Microsoft.AspNetCore.Builder;
using Microsoft.AspNetCore.Diagnostics;
using Microsoft.AspNetCore.Http;
using System.Net;
namespace GlobalErrorHandling.Extensions
{
public static class ExceptionMiddlewareExtensions
{
public static void ConfigureExceptionHandler(this IApplicationBuilder app, ILoggerManager logger)
{
app.UseExceptionHandler(appError =>
{
appError.Run(async context =>
{
context.Response.StatusCode = (int)HttpStatusCode.InternalServerError;
context.Response.ContentType = "application/json";
var contextFeature = context.Features.Get<IExceptionHandlerFeature>();
if(contextFeature != null)
{
logger.LogError($"Something went wrong: {contextFeature.Error}");
await context.Response.WriteAsync(new ErrorDetails()
{
StatusCode = context.Response.StatusCode,
Message = "Internal Server Error."
}.ToString());
}
});
});
}
}
}
|
In the code above, we’ve created an extension method in which we’ve registered the UseExceptionHandler middleware. Then, we’ve populated the status code and the content type of our response, logged the error message, and finally returned the response with the custom created object.
To be able to use this extension method, let’s modify the Configure method inside the Startup class:
1
2
3
4
5
6
7
8
9
10
11
12
13
14
15
16
17
18
19
20
|
public void Configure(IApplicationBuilder app, IWebHostEnvironment env, ILoggerManager)
{
if (env.IsDevelopment())
{
app.UseDeveloperExceptionPage();
}
app.ConfigureExceptionHandler(logger);
app.UseHttpsRedirection();
app.UseRouting();
app.UseAuthorization();
app.UseEndpoints(endpoints =>
{
endpoints.MapControllers();
});
}
|
Finally, let’s remove the try-catch block from our code:
1
2
3
4
5
6
7
8
9
10
11
12
|
public IActionResult Get()
{
_logger.LogInfo("Fetching all the Students from the storage");
var students = DataManager.GetAllStudents(); //simulation for the data base access
throw new Exception("Exception while fetching all the students from the storage.");
_logger.LogInfo($"Returning {students.Count} students.");
return Ok(students);
}
|
And there you go. Our action method is much cleaner now and what’s more important we can reuse this functionality to write more readable actions in the future.
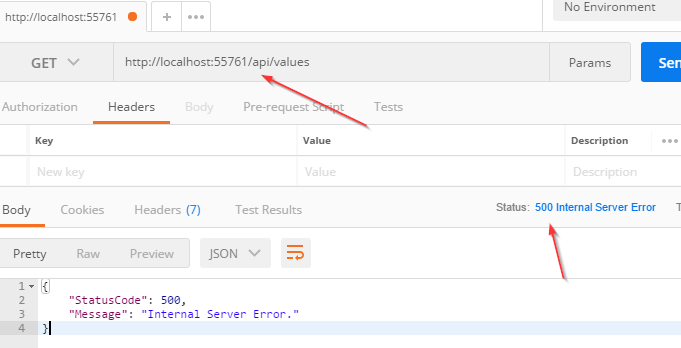
So let’s inspect the result:
And the log messages:
Excellent.
Now, we are going to use a custom middleware for global error handling.
Handling Errors Globally with the Custom Middleware
Let’s create a new folder named CustomExceptionMiddleware and a class ExceptionMiddleware.cs inside it.
We are going to modify that class:
1
2
3
4
5
6
7
8
9
10
11
12
13
14
15
16
17
18
19
20
21
22
23
24
25
26
27
28
29
30
31
32
33
34
35
36
|
public class ExceptionMiddleware
{
private readonly RequestDelegate _next;
private readonly ILoggerManager _logger;
public ExceptionMiddleware(RequestDelegate next, ILoggerManager logger)
{
_logger = logger;
_next = next;
}
public async Task InvokeAsync(HttpContext httpContext)
{
try
{
await _next(httpContext);
}
catch (Exception ex)
{
_logger.LogError($"Something went wrong: {ex}");
await HandleExceptionAsync(httpContext, ex);
}
}
private Task HandleExceptionAsync(HttpContext context, Exception exception)
{
context.Response.ContentType = "application/json";
context.Response.StatusCode = (int)HttpStatusCode.InternalServerError;
return context.Response.WriteAsync(new ErrorDetails()
{
StatusCode = context.Response.StatusCode,
Message = "Internal Server Error from the custom middleware."
}.ToString());
}
}
|
The first thing we need to do is to register our IloggerManager service and RequestDelegate through the dependency injection. The _next parameter of RequestDeleagate type is a function delegate which can process our HTTP requests.
After the registration process, we need to create the InvokeAsync() method. RequestDelegate can’t process requests without it.
If everything goes well, the _next delegate should process the request and the Get action from our controller should generate the successful response. But if a request is unsuccessful (and it is, because we are forcing exception), our middleware will trigger the catch block and call the HandleExceptionAsync method.
In that method, we just set up the response status code and content type and return a response.
Now let’s modify our ExceptionMiddlewareExtensions class with another static method:
|
|
public static void ConfigureCustomExceptionMiddleware(this IApplicationBuilder app)
{
app.UseMiddleware<ExceptionMiddleware>();
}
|
Finally, let’s use this method in the Configure method in the Startup class:
|
|
//app.ConfigureExceptionHandler(logger);
app.ConfigureCustomExceptionMiddleware();
|
Great.
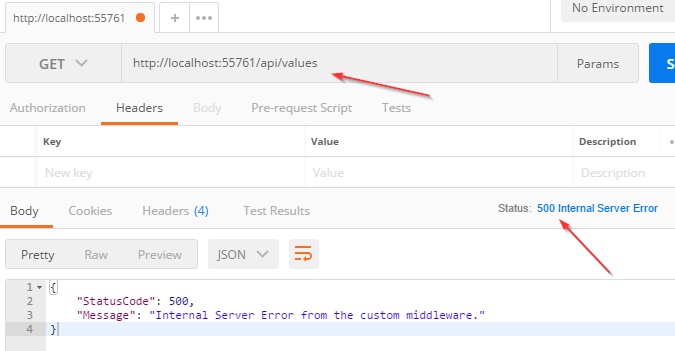
Now let’s inspect the result again:
There we go. Our custom middleware is implemented in a couple of steps.